
It has become apparent to me in job interview that interviews are amazed or aghast at the fact that I am a jack of all things IT. I think it bewilders many people. My job basically is to do what is needed to design, build and keep up a 24x7x365 IP Network and a Public Switched Telephone Network for a large 911 call center. In an effort to legitimize my jack of all trades IT, I thought that I would like to show/share some of my tasks. Today’s task is assembling our newest server.
We are an HP shop. We get the best deals on HP products and HP has been reliable for our needs at 911. Today’s server will be a new file and print server. We had a budget of only $4000 for this server and this is what we purchased,
ProLiant DL380 G7

2 – Quad-Core Intel® Xeon® Processor E5620 (2.40GHz, 12M L3 Cache, 80 Watts, DDR3-1066MHz, HT Turbo 1/1/2/2)
6GB RAM
4 – HP 300GB 6G Hot Plug 2.5 SAS Dual Port 10,000 rpm Enterprise Hard Drive
Smart Array P410i
2U Rack mount
I currently have 30 HP DL380 Gx
Because of our state contract with a vendor the server will come in a basic configuration of 1 CPU and no hard drives.

Sometimes the RAM is included and installed and sometimes if we have made modifications it won’t be.
The hard drives are a simple install. Pull out the blanks, and open the hard drive latches and push into slot until the latch locks. It’s a simple no brainer.
After unpacking the server from its box the next step is to open it up. On the back of the server is a little tool that will allow you to open up the case. It also fits the entire group of tool-less screws in the case. The case top slides to the rear.
After opening the case we want to add our CPU. The first part is to remove the air ducting that directs the air to the CPU and RAM. It is just set on top and requires no tools to remove.


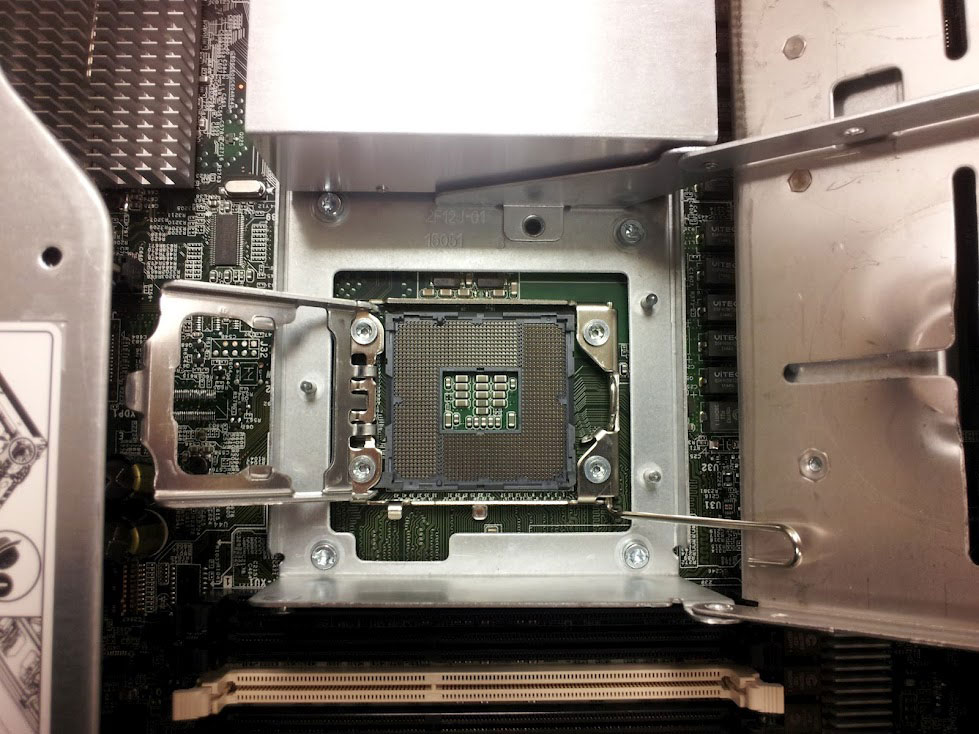
 Next remove the strap that is installed for shipping. It is black and is screwed down to the CPU heat sink hold down. You can toss it when you are done. The CPU heat sink hold down has a lever. Pull it up and the whole hold down moves out of the way. Remove the black plastic cover that covers the CPU socket. Remove the cover that is held down by the CPU clamp hold down. To remove this cover you must unlock the CPU locking mechanisms’ arm and pull it up. The new CPU has a plastic installer. The new CPU’s are pin free but have contacts instead. The CPU must be installed in the proper position which is built to only install one way. The plastic applicator is shaped so that it goes in only one way and it perfectly aligns the CPU. Pinch the plastic release the CPU is released from its applicator. Next you must close the locking arm for the CPU and secure it under the clip that holds it secure.


The next step is to install the CPU heat sink. It already has the thermal grease applied to the heat sink. No hassle, no mess when trying to apply it. Put the heat sink on top of the CPU. The heat sink has three pegs that it sits on one on one side and two on the other. I did notice that there was a sticker that had a direction on it but it was in direct conflict with the posts the heat sink sits on. So I would say It’s 99% idiot proof. Once the heat sink is in place close the heat sink clamp and push the lever back down. The CPU is now installed.


Adding a second CPU increases the need for cooling. HP includes the additional fans for the CPU. They are a simple pull out the plastic divider and drop in the new fan. The fan module is directional but can only be installed in one direction.


Last thing to do is to put the plastic air ducting back in place and put the top back on. Sometimes aligning the tabs on the case top is tricky and sometimes you must realign the plastic ductwork for it to sit correctly. It’s not terrible difficult though.
Now the assembly of the server is mostly done. Now I need to find a place in the rack to mount it and begin installing Windows 2008 Server R2.